Showing posts with label Manjaro tutorial. Show all posts

Manjaro 17.0.2 Installation Tutorial

The new version of Manjaro 17.0.2 is now available for download. Today, I will show you how to install Manjaro 17.0.2 on our system. I choose the Manrao 17.0.2 GNOME on this tutorial. Manjaro 17.0.2 brings a lot of improvements. You can read my review of this new Manjaro 17.0.2 before deciding to install it.
Installing Manjaro Linux is very easy. The Calamares GUI installer is very helpful and informative. Anyone can install Manjaro in few steps.

Manjaro 17.0.2 Installation Steps

Step 1. Boot the computer

On the first boot screen, you may change the default language and some other settings.


Step 2. Open the installer


Step 3. Select Installation Language


Step 4. Select location

At this point, we need to select our location from the map. Also we can change the system language and locale.  

Step 5. Select Keyboard Layout


Step 6. Installation method

Select the installation method and disk partitioning. You may use the default disk layout or create manually.  

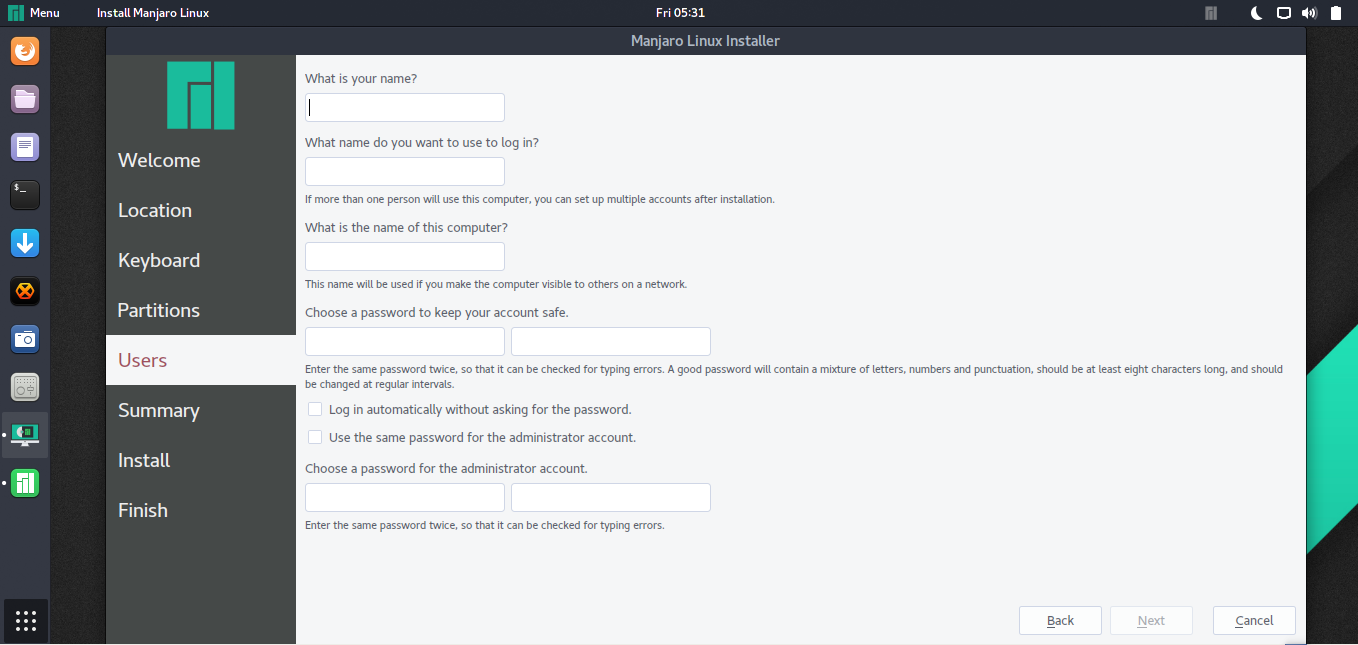
Step 7. Create new user
Step 8. Installation Summary

Step 9. The install process

The installation process should now begin. It takes some times to complete.

Step 10. Reboot Manjaro

Once the installation has been completed, reboot your computer and enjoy Manjaro 17.0.2

How to install Gnome Desktop Environment on Manjaro 17.0

This tutorial is going to show you how to install GNOME desktop environment on Manjaro 17.0. As you know, we may install multiple desktop environment on top of a distribution. For example, we can run Budgie Desktop and GNOME together. So we can choose which one to use. Its pretty simple and straight forward to install GNOME on Manjaro 17.0.

Steps to install GNOME on Manjaro 17.0

Step 1. Update Manjaro

To update Manjaro, execute this command on Terminal
sudo pacman -Syu

Step 2. Install GNOME

Use this command to install gnome and gnome extra packages
sudo pacman -S gnome gnome-extra
Output example:
[dhani@dhani-manjaro ~]$ sudo pacman -S gnome gnome-extra[sudo] password for dhani: :: There are 47 members in group gnome::: Repository extra   1) adwaita-icon-theme  2) baobab  3) empathy  4) eog  5) epiphany  6) evince   7) gdm  8) gdm-plymouth  9) gnome-backgrounds  10) gnome-calculator   11) gnome-contacts  12) gnome-control-center  13) gnome-dictionary   14) gnome-disk-utility  15) gnome-font-viewer  16) gnome-keyring   17) gnome-screenshot  18) gnome-session  19) gnome-settings-daemon   20) gnome-shell  21) gnome-shell-extensions  22) gnome-system-monitor   23) gnome-terminal  24) gnome-themes-standard  25) gnome-user-docs   26) gnome-user-share  27) grilo-plugins  28) gtk3-print-backends   29) gucharmap  30) gvfs  31) gvfs-afc  32) gvfs-goa  33) gvfs-google   34) gvfs-gphoto2  35) gvfs-mtp  36) gvfs-nfs  37) gvfs-smb  38) mousetweaks   39) mutter  40) nautilus  41) networkmanager  42) sushi  43) totem   44) tracker  45) vino  46) xdg-user-dirs-gtk  47) yelp
Enter a selection (default=all): 
Press enter to install all packages. Follow on screen installation wizard until it completed. Please note that this step requires internet connection. Make sure you are connected to the internet. 

How to install Budgie Desktop on Manjaro 17.0

This quick tutorial is going to show you how to install the latest Budgie Desktop on Manjaro 17.0 desktop. Why Budgie? Budgie is believed as a simple, lightweight and beautiful desktop environment for Linux. It was made popular by Solus OS. Budgie is actually a fork of GNOME desktop but way simpler and more lightweight.
In order to install Budgie Desktop on Manjaro, all you need is a working network connection. The Budgie Desktop is included in Pacman repository on Manjaro. You can either install Budgie Desktop via Terminal or Pacman GUI.

Install Budgie Desktop via Terminal

If you prefer to install using Terminal, use the following command to update and install Budgie Desktop on your Manjaro Linux.
sudo pacman -Syu
sudo pacman -S budgie-desktop
The download process will started and in few minutes, the Budgie Desktop should be installed.

Install Budgie Desktop via GUI

Open Pacman software manager and type budgie on the search box. You will see any packages related to budgie will show up. Select budgie-desktop from the list and mark it for installation. Press Apply to confirm and the process will started.
install budgie on manjaro 1
Optionally, you can also install budgie-wallpapers and manjaro-budgie-settings that will make Budgie Desktop more usable.
Once complete, simply log out and re login to the new Budgie Desktop. 

Install Cockpit, Web Based Administration Tool on Manjaro 17.0

Cockpit is a great web based management tool to manage Linux servers. It has many features to monitor your server, configure the storage, network and many others. This tutorial will show you how to install Cockpit on Manjaro 16.10. Other user with different Manjaro version can try this method as well. Cockpit now become a default package on Fedora 25 and newer. 
Before we go through here are some screenshots of Cockpit, The Web Based Administration Tool on Manjaro


I understand that most desktop users do not need to install Cockpit on their system. But, in case of you want to turn your Manjaro into your personal server or you just want to play around with it, you may consider installing Cockpit on your Manjaro.

Steps to install Cockpit on Manjaro 17.0

Step 1. Enable AUR Repository

Since Cockpit package is available on AUR repository, we need to enable it first. Please read this post in order to enable AUR repository on Manjaro.

Step 2. Install Cockpit

You can either install it via Pamac Software Manager or simply use the following command to install Cockpit. Please make sure you watch the Manjaro screen since this installation steps will ask your confirmation few times.
yaourt -S cockpit
Once finished, you can access Cockpit web dashboard using a web browser. Type your Manjaro IP address with the following format
https://your-ip-address:9090
Thanks for reading.